Showing posts with label Cake decorating. Show all posts

Friday, 5 July 2013

Arsenal Cake

Gary asked me to make a cake for someone at work this week, he had been working there for 20 years and Gary thought it would be nice to celebrate this. The guy is an Arsenal fan so we decided I'd make a cake of the Arsenal badge. 

In order to design this cake I found a logo on the internet and printed it out on A4 paper. I then used this as a template on my chocolate sponge. A friend told me that it was easier to carve the cake if cold so I placed it in the fridge overnight and sliced it in the morning. Once carved I covered it with chocolate buttercream
Buttercream covered cake
 I then set about doing the icing, as usual I used ready made icing and my gel colours to create what I wanted. I decided to cover the cake in gold icing, however, I struggled to get a gold colour. I started off with yellow and then according to wilton website I should add a small amount of green. I decided to test this with a small ball but it just turned green!! So I tried again with even less green. It worked a little better so I did it with the whole ball of icing. I didn't really get gold, but I didn't want to risk making it green so decided it was close enough. 
My 3 icing piles
I then used this to cover the cake and careful cut trimmed around the edges. 

Covered and trimmed cake
Next step was to start the badge on the top. I first made some icing blue and, using the template, cut the strips to go around the outside. I then coloured some icing red. I noticed that the badge isn't a solid red but has a darker red on the right, so I cut these as 2 halves colouring the right slightly more with a touch of black to make it darker. 
Red and blue added. 
Using the gold icing and template I'd made earlier I carefully cut out a cannon. 
Cannon made
I then cut out the letters using the template and stuck these on. I also used the white icing to complete the strips around the outside. I did this by placing the icing on top and cutting it to fit the gap between the red and blue. I did it like this rather than using the template because the badge was slightly off shape by now and so the sizes wouldn't quite match up. 
Cannon and letters stuck on. 
 The final step was to complete the detailing on the cannon and the letters. I used white around the cannon and gold around the letters. To do this I careful rolled the icing into really thin sausages. Using edible glue I stuck these around in the detailing and used a toothpick to neaten up the shaping. This isn't the ideal way to do this but I'm not confident enough about my piping skills just yet to do this by hand. 
Finished cake
And that was the cake finished. I was reasonably happy with the end product. It's clearly identifiable, which is the most important thing, but as always there are things I think I could improve. Practice makes perfect!! 

Friday, 18 January 2013

Shuttlecock Cake

As mentioned previously, it's my husband's birthday this weekend so I wanted to make him a birthday cake. He really enjoys badminton so I thought an appropriate theme would be to make a shuttlecock cake.

I had 3 options for the style of the cake:
1) Make a 3D cake in the shape of a shuttle and decorate the whole thing as such.

2) Make a square cake and place a shuttle image on top of the cake, this option gives room for name personalisation etc.

3) Make a square cake and carve out the shape of a 2D shuttle and decorate it as such.

Whilst I think option 1 would look very impressive, it is the mostly likely to go drastically wrong and in my current state a bit too ambitious, so it was between 2 and 3. I decided to go with 3, and make the shape of the shuttle, I think this will be more impressive and more what I'm trying to achieve with this cake.

First step was to make a template of the shape of cake I wanted, this was important so I could find out what size tin I wanted to make it in. I drew this freehand after borrowing a shuttlecock from my husband's supply. 
Paper template of the cake
After this we worked out that I would make a large rectangular cake so used a big roasting tin. For each layer of the cake I decided to use a 4 eggs mix, 200g of each of the other components:
200g SR flour
200g Sugar
200g Marg
4 eggs.
I then melted 100g of white chocolate and stirred this into the mix and also stirred in some halved raspberries, carefully so they wouldn't break up too much. 

This mix was then put into the tin and baked in the oven for around 40mins, 200oC. I had to cook each layer separately, due to tin restrictions, and left each to cool down. 


Using the template I cut out the shape in both layers. 
Top layer of the cake, cut and cooling. 
Bottom layer of cake, cut and cooling. 


Once the cake was cooled we made some butter icing to place the two cakes together and also I placed a layer around the outside of the cake. My husband really likes raspberry icing so I made this for him. 
250g Unsalted Butter
500g Icing sugar
Around 150g Raspberries mashed with a fork. 
Cake covered in raspberry butter icing.
We used ready made fondant icing to create the outer layer. I got my mum busy colouring and rolling for me. The first layer needed to contrast the white outer layer, I decided on a grass green colour. Mum mixed in the gel icing colour and rolled it out to cover the outside of the cake. 

Mum hard at work
Green icing is applied to the cake. 
The icing was naughty and stuck to my special mat, so this has resulted in a slightly rough surface and some tears. Next time we will only use cling film as this worked much better for the later layers. 

The next step was to cover the round end of the cake, we decided to colour this a golden yellow, again I got mum to work with this and we carefully placed it on the end. 


Yellow cap is on
Next step was the important step, creating the feathers and the grid pattern. I had two choices, either make them as separate pieces and stick them on or make it as one piece. I decided 1 piece would be better so mum got to work rolling that out. I wasn't sure whether to cut it and then place it on or place and cut, we decided it was less likely to fall apart if we placed it on and then cut it out. 

White icing ready to cut into pattern
Using a feather shuttle as my template I set to work cutting out the pattern freehand. I used a very fine point and marked it out first of all working out where everything would go. Once I'd outlined it I use a sharp knife and my point to carefully extract the spare icing. 

Me concentrating on the design
While I was cutting mum created a band to join the white and yellow icing, again colouring the icing and rolling it out. I then placed this on top and cut it into a strip. 

I used one of my icing tools to carefully mark feathers into the icing by tapping gently and repetitively  Once that was done the cake was finished. I was happy with the end product and, apart from the green icing layer, I don't think I could have done any better. The cake looked like a shuttlecock. We are yet to taste it so I can't comment on that but looks wise very happy. My husband also likes the end product and says he gives the design 9.5/10, which is a high score so I'm happy. Hard work but worth the effort. 
The finished product with my two real shuttles as inspiration. 
The finished product. 

Wednesday, 17 October 2012

Dad's VW Cake

Recently I have been quite unwell and unable to create cakes to the standard that I would like, however, with a lot of help, I made my dad his birthday cake last weekend. My dad has always been a great VW supporter and used to love his camper van and seeing loads come down to Brighton the weekend before inspired me to make him a camper van cake. It was a very simple idea, create a rectangle and decorate it. 

I order to make the cake, my husband and I, made a sponge mixture with a bit of mixed spice in it and baked it in a square dish. When cooled and at my parents, I cut this into 3 sections, piled 2 on top of each other and then the 3rd piece was cut to make the cake slightly longer. 

I made some lemon buttercream to hold the cake together, using butter, icing and lemon juice and then applied this over the whole cake to create a sticky surface for the icing. 

We rolled out the icing and covered the whole cake with white as our base layer. Then coloured another piece red which was to be stuck, using edible glue, around the bottom of the cake and shaped into a V on the front. I also coloured some icing black for the wheels and the VW badge (which I cut using a sharp knife) and some grey for the windows. Mum made a bumper out of some more black and we made some flowers for the roof using purple and my new cutters. 
Side View


Flower Power


VW badge on the front


Overall the van was recognisable but did look rather like a collapsed camper van rather than a fully functioning one. If I had more time and energy I would have made this more uniform and neat, however, I was happy with the end result as was my dad. 

Next up is my mum's birthday at the beginning of November, let's hope I start feeling better by then and am able to put more effort into hers. 

Tuesday, 2 October 2012

The Final Peppa Pig Cake

This weekend fast approached and I needed to make a cake for my niece's 2nd birthday, all the preparation and practice was coming down to this final product.

I had a few problems with my Peppa shape sinking slightly so I read about this and discovered that if I make her early and leave her to dry a little then this might solve the problem, therefore, I made Peppa and George on Wednesday before everything else and left them in an airtight container in the fridge.

To make Peppa and George, I started off by colouring the icing to a pale pink using my paste colours. I then made 2 balls, different sizes and carefully shaped these into Peppa and George's faces, having done this before it wasn't too difficult. I then coloured 2 further balls of icing blue and red for the bodies. I decided I wasn't going to try and make feet as I didn't know how to make them strong enough so we'll pretend that the feet are in the puddles. I also added some pink arms and a tail to the body and used edible glue to stick these on, great idea as it held so much more firmly.

Peppa and George ready for detailing.. 

Ruined Peppa
Finished Peppa
Then came the difficult part, the details on the face, I started with colouring a deeper pink circle for their cheeks and stuck these on with glue. Then I did made small white balls for the eyes and stuck these on. Using a toothpick I dotted a small black eye on both. And then came the painting, I diluted down some paste with water but the first time my mix was too runny and I ended up ruining my Peppa, therefore I quickly made another one and reduced the amount of painting I would do. I used one of my new tools to make nostrels for her and painted in those and just dotted some on for George. Finally I painted on a small mouth on both.
As you can see from the pictures I also made a 2 out of some icing which I coloured yellow, this was just an easy sausage folded onto itself and carefully proportioned in order to create an image.

Next step was to make the cakes, due to my current sickness issues I needed help at this stage from my wonderful husband. I instructed him to make a normal sponge by adding 600g of flora, sugar and flour together, mixing and then adding 6 eggs. Once the mixture was lovely and light he split it with 1/4 in one bowl and 3/4 in the other. We added cocoa to the 1/4 and pink colouring to the remaining 3/4.  These were then layered into 2 different cake tins, a larger and smaller one. Normally I would have liked to have cooked 4 layers here but we don't have the tins so we had to make 2 larger cakes to be sliced later. We used a toothpick to create a marbling effect and hoped it would be better than last time due to the ratio of dark to light. The cakes were cooked until pulling away from the sides of the tins and a knife was coming out clean, and then left to cool overnight.

Next day my husband cut the cakes into 2 for me down the centre and levelled them out ready for the final decorating stage. 
Cakes are halved
And level.


Together we made some raspberry buttercream and then formed the cake. Buttercream went between each layer and around the outside of the cake. We coloured a block of icing green  and this was to cover the whole cake. Unfortunately this fell apart and so the surface of the cake wasn't very smooth and became patchworky but we didn't have time or energy to try again so left it. I cut out some muddy puddles for the top of the cake from brown icing and stuck these on with edible glue. Using pink icing I cut out Keira's name and stuck on the outside along with some butterflies to try and cover the bumps. 
Cake is iced and named


Muddy puddles
Close up..


Finally once we reached the house, using cocktail sticks, Peppa and George were placed on the top. The cake was complete. 
The finished cake

Close up Peppa and George
Slightly different angle


The marbling on the inside came out much better this time so I've learnt that the lighter colour needs to be a much higher ratio than the darker. 

The cake is sliced and here's the inside

A bit of artistic photoing from my hubby!!


My verdict is that it was ok but I would have preferred to get the icing better as I think this spoilt the finished product, I would also have liked to have letter cutters for the name 

Tuesday, 11 September 2012

Peppa Pig Cake Take 2

I received a message asking if the cake could be a chocolate cake so that ruined all my ideas for a lovely pink and white layer, so I thought about how I could still get some of the wow factor when cutting into the cake. 

I decided on a marble cake, chocolate sponge with pink sponge mixed in creating a marble effect. I made a cake batter and split it in 2 adding chocolate to one mix and pink to the other. 
Batter is coloured and ready
I placed spoonfuls of each mixture in the cakes tins mixing them up with a knife to create a swirled effect. 

Cakes swirled and ready to go in the oven. 

And the put them in the oven to cook. 

Cakes out the oven.
While the cake cooked I made a start on Peppa, I wanted to take more time over her today and try and do a better effort. Following information from my mother, I made the body more of a semi circle ready for the head to sit on. I took much more time over the head, I started with a ball and then carefully shaped out a snout, the rest of the head I formed an oval shape out of. The snout started off too long so I shortened this a little and tried to make it more in line with the top of the head as this is how it looks in the pictures. 

Once I was happy with the shaping I carefully painted on the outline of the snout. To make the eyes and cheeks this time I decided to use icing. I coloured one bit a deeper pink, made tiny balls and flattened these out for the cheeks. For the eyes I did the same thing, even smaller, and painted a black dot in the middle. At the moment I don't have paint brushes so I had to use toothpicks for the painting, challenging but I think I pulled it off. The only issue I have now is the mouth, I've only seen a 2D image and it's difficult to make the mouth work, it can't be just one side but all the pictures just show it on the side and not going under the snout. When I try and draw it on her mouth looks too long and gives a bit of a freaky grin about her. I think once I've got the mouth sorted I'll be quite happy. I made some small ears and arms using the pink icing. I held on the arms with just 1 toothpick going through the body to hold them in place. 
Peppa Pig
Finished cake side
Finished cake other side
 I decided to decorate the top of the cake with green icing as this is what it'll be for the finished cake. The eventual aim is that this is the grass and they'll be muddy puddles that she's jumping in. I don't have any brown at the moment so I think I'll have to purchase some already coloured brown for that purpose. I need to also make a George pig and a number 2, each in puddles. There's also a possible house to build but I think I might run out of room on top of the cake.

For the final cake I intend making it 4 layers so there's a larger cake underneath, the cake will look more grand and will have more height to it. I hope she'll like it. 

 The final cake didn't have the marbling that I hoped once baked. The chocolate seems to have taken over the cake. Next time I'm going to try 3/4 pink and 1/4 chocolate in order to try and get the marble effect across. I hope it'll still be chocolatey enough then, only way I can check is to try it!! I made this cake with just standard pink buttercream, the cake was really missing something without the raspberry buttercream. That'll certainly add something to the final cake, flavour and colourwise. 

Please let me know what you think.. 
A slice of the cake showing the marble effect, or lack of it.


Tuesday, 14 August 2012

Rose Swirl Cupcakes

Today I decided to try out the rose swirl on the top of cupcakes. I made 2 flavours of cupcakes... Chocolate and a slightly spicy ginger one. (made that up!!) and then 2 colours of icing to top them.

Cupcakes are baked and ready for decorating
To make the icing I used real unsalted butter and beat it until soft then added icing sugar and beat and beat till the whole lot had softened up. I didn't add any milk to this as by the time I'd finished beating it seemed soft enough.

I split the mixture into 2 and coloured one half pink and the other ivory. The plan was to make the roses in the pink and try something else in the ivory, however, it didn't quite work like that. I followed a tutorial I have signed up for online and carefully copied what they did. Unfortunately, my guess at which nozzle to use turned out to be wrong and so the first batch were very tight and so didn't have the right effect. However, I think they still look pretty.

The pink batch with a tight nozzle


Still looking pretty but not the effect I was going for


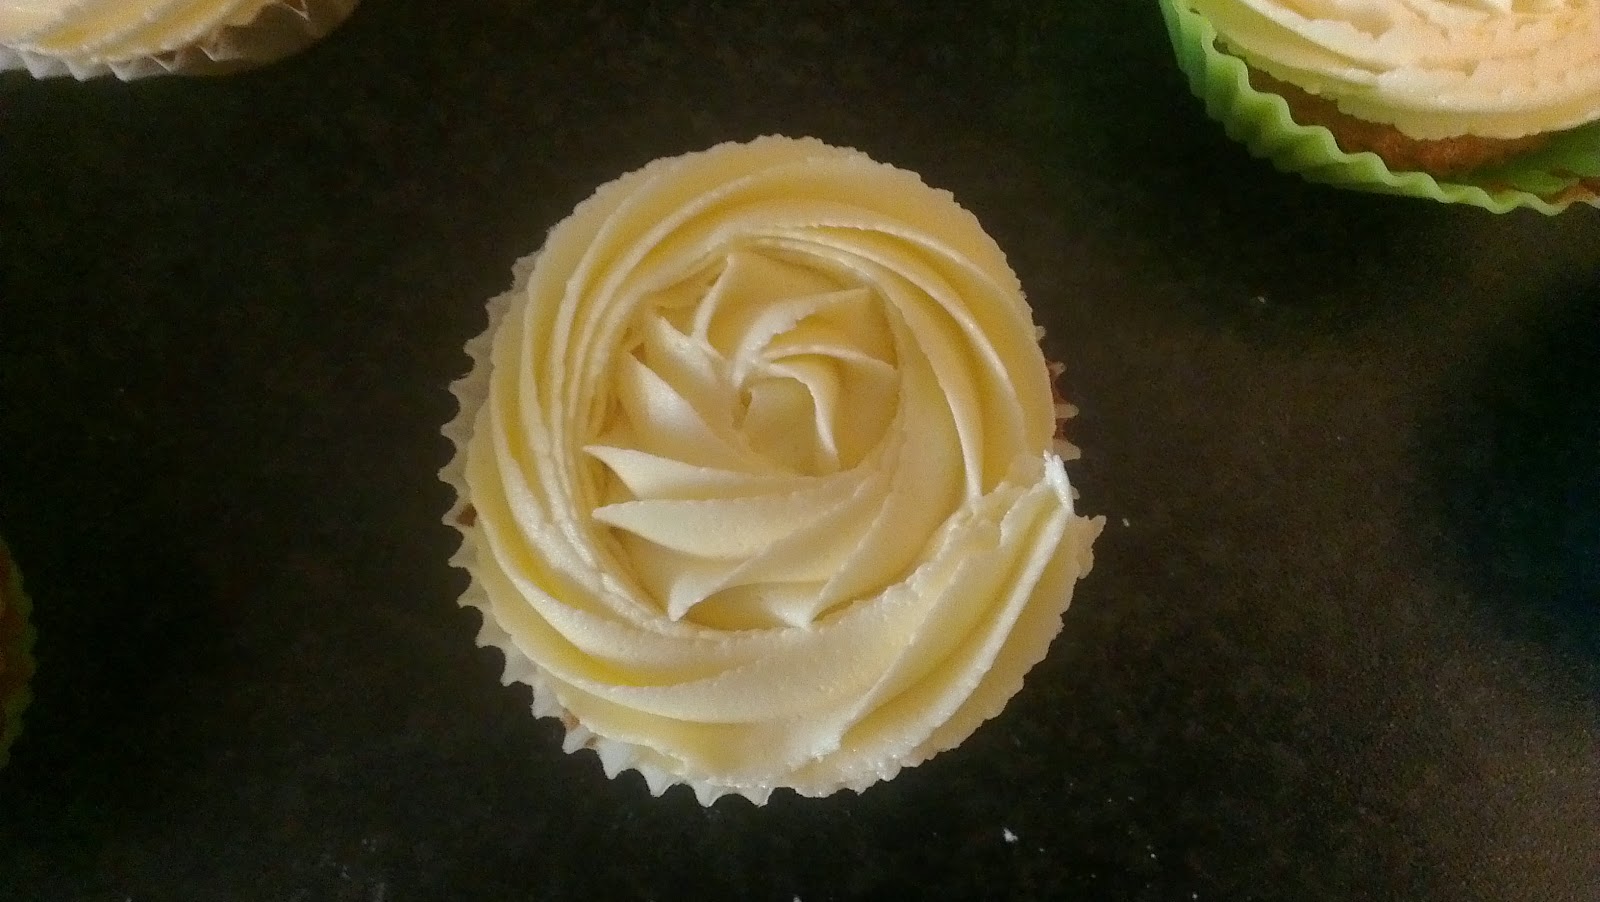
After another look at the video, I realised that maybe I needed a larger nozzle so I found one that matched more closely. After a few attempts I think I sucessfully pulled this off and was really pleased with one in particular. I decided to try and colour the edges with pink to emphase the effect even more.


Ivory batch

With the star rose shape


 The star cupcake can be seen below from a few angles:

Trimmed with pink

Different view

Another view
 
Overall I'm really pleased with that cake but it's not great odds, 1 out of 24 cakes. I'm going to have to practice some more but at least I've learnt what I'm doing wrong. Whip the icing for much longer and use a larger nozzle!!

Saturday, 28 July 2012

On the Farm Cupcakes

Today I decided to attempt some decorating of cupcakes, I found this idea from a website that I've recently subscribed to "Mrs Bakers Cakes" which does online cookery courses and tutorials. Today I tried the on the farm tutorial which described how to make some animal cupcakes. 

Down on the farm.. with the sheep and cows
My husband made some cakes for me whilst I was out at work and allowed them to cool. I then made some butter icing (real butter) and spread that over the top. 

I then coloured some ready made icing in pink and rolled out the white. I cut a large circle out of the white and placed this over the cupcake, then I cut out the same size circle in the pink. Cut this using the same cutter about a third of the way through and this piece is placed on top. 

Using black icing I draw some eyes on the face and used a cocktail stick to make the shaping of the mouth. Using black icing I cut out small circles and made the ears for the cow and then white circles for the sheep. Stuck it all together. 

Zoomed in on the sheep


With the remaining butter icing I practiced my piping skills and piped onto the spare cupcakes. This is coloured slightly purple but I used a silver sparkle spray on top. I can't really see a difference though. 
Piped cakes

Piped cakes