Showing posts with label annie bell. Show all posts

Wednesday, 28 August 2013

Lemon Custard Tart

My custard tarts have been really popular at Gary's work so I decided to try this variation that I found in Annie Bell's Baking Bible. 

The recipe was different from what I was expecting. I thought I'd make a custard and make it lemony, however, this was a liquid until baked in the oven. I guess a baked custard. Anyway, the recipe was again very easy, as I've come to expect from Annie Bell's recipes. 

First step was to make the pastry, this was made by combining all the ingredients in the food processer and then chilling for an hour or so. The pastry is the pressed into a cake tin. This bit was quite challenging because the case needs to be 6cm high but I got there in the end.

Pastry Case
The case was then baked blind and left to cool. 

The custard was made by combining all the ingredients and then pouring into the pastry shell.
Ready to go in the oven
This was then cooked for around 1.30hours and left to cool.

Baked Custard
The verdict: This recipe has produced mixed verdicts. Both Gary and I thought that the tart was nice, however, in places it was very eggy. I think it seperated in the oven and so some areas tasted of just egg whereas others had been nicely combined and tasted really good. The lemon was a nice flavour, not too strong, but no one knew that it had orange in it. My sister and mum thought that it was really nice and happily demolished the whole tart over the weekend. I would give the tart 7/10.
Finished pie and eaten!!

Wednesday, 14 August 2013

Apple and Oat Shortcake Bars

I decided to make the next recipe in Annie Bell's Baking Bible Traybakes section. That was Apple and Oat Shortcake Bars. These have a shortbread base, apple and then are topped with flapjack. The recipe, as always, was very straightforward and worked nicely. However, this time I decided to make it twice and alter the recipe slightly. The full recipe I used will follow but firstly I'll talk about the recipe from the book. 

The base is a simple shortbread recipe where the ingredients are combined in a food processer until dough like. It is then chilled for a few hours and pressed into a tin before baking. 
Shortbread chilling
The apples are then sliced and mixed with currants and sugar. All sprinkled on top of the shortbread and then topped with the flapjack, which is just a case of melting butter and golden syrup and mixing with oats. 
Assembled and ready for the oven

The whole thing is then baked and enjoyed. 
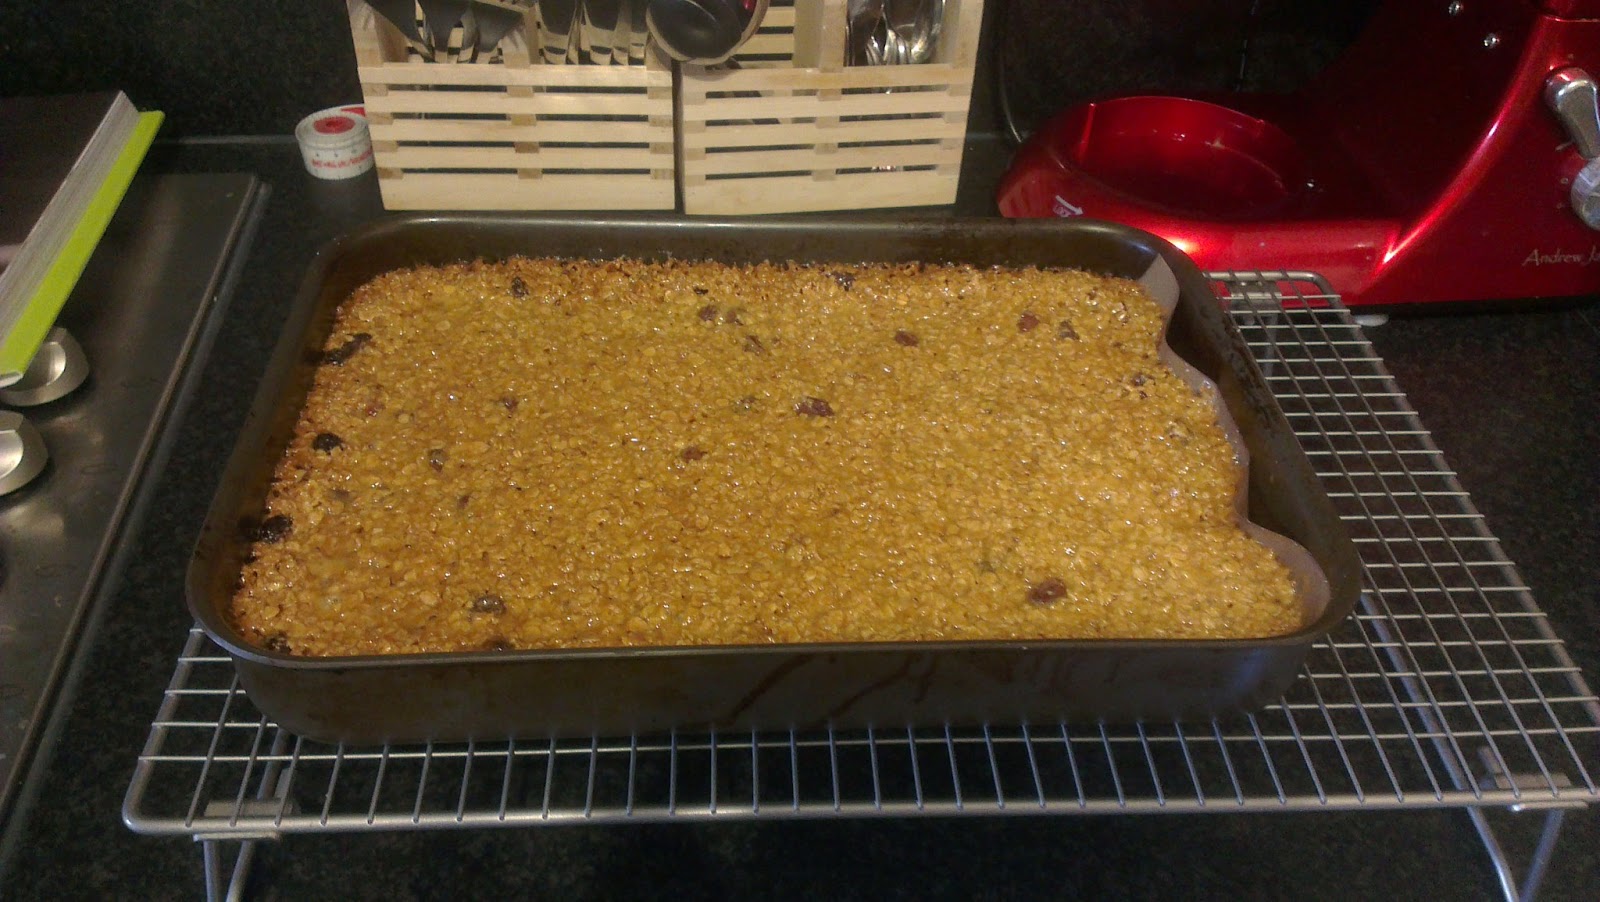
Baked and cooling
I found that this fell apart too easily and was very difficult to eat. It was lovely and moist but there wasn't enough shortbread and in places you couldn't taste it at all. 

So in line with these comments I adjusted the recipe to try and improve it slightly. 

Ingredients:

Shortbread:
250g Butter
110g Sugar
352g Plain Flour
100g Currants

400g sliced cooking Apples
75g Muscavado Sugar

Flapjack:
200g Butter
200g Golden Syrup
225g Rolled Oats

Method:
Mix together the ingredients for the shortbread in a food processor. They should form a dough which is fairly sticky, not dry. 
Dough ready to be pressed into a tin and chiled
Press into a lined tin and cool in the fridge for several hours. 

Prick the shortbread with a fork and place in the oven, 140oC, for 30minutes until just beginning to colour. 

Place the sliced apples over the shortbread and sprinkle with the sugar. 

For the flapjack melt the butter and golden syrup together in a saucepan. Mix in the oats and spread the mixture on top of the apples. 

Place in the oven, 180oC, for 30minutes. The flapjack should be starting to colour. 
Cooling
Leave to cool and then slice and enjoy. 
Sliced finished product

The verdict: As you can see from the picture this shortcake held together much better than the original. The shortbread was much more promenant and tasted really good. Gary stated that if it was just the shortbread and flapjack it would be even better but I disagree. The apple adds some moisture to the cake making it less dry. I would have prefered a little more moisture but the risk would be that the cake would then fall apart so I think this was a good compromise. I give it 8/10. 

Tuesday, 30 July 2013

Almond, Apple and Blackberry tart

I've skipped a few chapters in Annie Bell's Baking Bible and ended up choosing something from the tarts and pies chapter. The first recipe in this chapter is Apple and Almond Tart, I decided to alter it slightly and added some blackberries. 

First step is to make the pastry, Annie recommends doing this in a food processor so I used my mixer. Simply cream together butter and sugar. Mix in the egg and finally the flour and ground almonds. Mix till it forms a dough and then wrap and place in the fridge for several hours. 
Wrapped pastry ready for the fridge.
Once the dough is fully chilled roll it out and place in a flan dish. I found the dough didn't hold together at all and kept sticking to the side no matter how much flour I put down so I did this in stages. Rolled a section and placed in the dish. Then added more and more pushing it together with my fingers to form one piece.

Cover in greaseproof paper and fill with baking beans. Place in the oven for 20minutes. I did this stage for too long so my pastry has come out a little too crispy. 

For the filling mix together butter, sugar, ground almonds and plain flour. Add the eggs and mix together throughly. Place this in the cooled pastry case and top with sliced apple and blackberries. 

Place in the oven for 45 minutes, this is longer than the recipe stated but I found mine needed the extra time. The tart should be browned and spring back when touched. Leave to cool, slice and then enjoy!! 
Finished tart
The verdict: The pastry was really lovely, it melted in my mouth and tasted great, and I don't even like pastry!! The filling had quite a strong eggy flavour, I couldn't really taste the almonds and would have liked this to taste stronger. The fruit was really nicely cooked and softened. I enjoyed this enough to want more than my tiny piece (on a diet) and to consider making it again. Next time I'd consider putting in some almond essence to strengthen the flavour. 8/10. 

Wednesday, 24 July 2013

Chocolate Orange Torte

I found a recipe in Annie Bell's Baking Bible, the next one in the chocolate cakes chapter, for tiramisu torte which I thought sounded like a good idea. However, neither me or Gary like coffee so I decided to adjust the recipe and make it my own, instead of coffee I made a orange torte. 

Ingredients: 
50g self-raising flour
50g dark muscovado sugar
50ml vegetable oil
1 egg separated
1 tsp orange extract
1 tbsp milk

300g dark chocolate
4 eggs, separated
30g caster sugar
250g mascarpone
1tsp orange extract

orange zest to decorate

Method:
Mix the flour and sugar together. Add the oil, 1 egg yolk, orange extract and milk. Stir the mixture until smooth. Whisk the egg white until stiff. Fold in the flour mixture.
Cake mixture all mixed together. 
Pour into a greased 20cm tin and place in the oven, 150oC, for 20minutes until the cake is firm and slightly browned. 
Cake out of the oven. 
Melt the chocolate and allow to cool. Whisk the egg whites until stiff. Whisk together the sugar and egg yolks until the mixture is pale and thicker. Add the mascarpone to the chocolate and stir until combined. Fold this into the yolk mixture. Fold in the egg whites and finally the orange extract.
Chocolate mixture for the top.
Make sure the mixture is fully combined and once the cake is cooled pour the mixture on top.
Ready to go in the fridge.
Smooth the top and place it in the fridge for a few hours until it has set. Use the orange zest to decorate the top.
It came out the tin in one piece.
The verdict:  I really enjoyed this torte, the chocolate mixture was really light and mousse like. The orange was subtle but I thought it had just enough flavour. The sponge mixture underneath was lovely and light, a really good contrast to the mousse. I think another variation on this would be a biscuit base as this would add a variety of texture. I wouldn't want to eat more than a thin slice as this was very rich but I really enjoyed the small amount that I had. I would give this 9/10. Gary gives it 10/10, he suggests putting crystalised orange on the top as a garnish. He says it's very nice mousse and cake. Its held its shape well and he would be very happy for me to make it again!! 
And sliced up beautifully. Yummy!! 

Tuesday, 23 July 2013

Genoise Cake

My mum told me about this type of sponge cake a little while ago, something I'd never heard of, a genoise cake. I've adapted this recipe from Annie Bell's Baking Bible but put my own twist on it. 

Genoise cake is meant to be a lighter sponge and is easy to flavour with syrups or layers. I decided not to flavour mine, this time, but added a cream and fruit filling. 

Ingredients:
3 eggs, separated
125g Caster Sugar
1 tsp Vanilla Extract
100g Plain Flour
50 Butter, melted

250g Marscapone
250g Creme Fraiche
3 dsp icing sugar
Blueberries
Grapes

Method:
Whisk the egg whites until they form stiff peaks. Gradually add some of the sugar until the mixture is glossy and thick. I added around 4 dessert spoons. 
Egg whites whisked and glossy. 
Whisk the egg yolks with the remaining sugar until the mixture is really pale and has thickened up. Stir in the vanilla extract. 
Egg yolk whisked and very pale. 
Fold half of the egg yolk mixture into the whites mixture and then the remaining half. 

Finally add the cooled melted butter and fold this in until the mixture is combined. 
All ingredients folded together.
Pour the mixture into a buttered 20cm loose bottomed tin and place in the oven, 150oC, for 40 minutes.
Cake in the oven.
The cake should feel firm to touch and be slightly golden brown. turn the cake out onto a cooling rack and allow to cool down. 
Cake cooling on the rack. 
Mix together the marscapone, creme fraiche and icing sugar. 
Marscapone mixture
Cut the cooled cake in half and spoon some of the mixture into the cake. Cut the cake in half.
Cake halved.
Place most the fruit on the centre of the cake, top with some more of the marscapone mixture. 
Fruit in the middle of the cake
Top the cake with the remaining marscapone mixture and add a few pieces of fruit to decorate. 
Finished cake.
The Verdict: I really enjoyed this cake but it was more the filling rather than sponge that drew my attention. The cake was a nice background to the cream and fruit, it wasn't too heavy and was definitely a nice light cake. I found this recipe more fuss than a normal sponge and I'm undecided as to whether it was worth the effort. I think if you were looking for a nice summer cake to go with summer fruits then it works very well so worth considering. The recipe worked very well and there isn't anything I would adjust. I would be tempted to experiment with different flavours and maybe try flavouring the sponge next time. I would give this cake 8/10 and Gary gives the cake 7/10. He thinks it should have had more fruit in the middle of the cake. 
Inside view.


Wednesday, 17 July 2013

Old-Fashioned Meringues

The first recipe from Annie Bell's Baking Bible meringue chapter is of course meringues!! I not really had success with meringues in the past, they tend to be too chewy, or under cooked, or over cooked. I decided to just go with the basics and see how I get on. It's a very standard recipe. 

3 egg whites
175g Caster sugar

Whisk up the egg whites until they are really stiff, the book says shaving foam consistency which I thought was a good description. 

Add the sugar one tablespoon at a time and whisk well. The mixture should be thick and glossy. This is where I've made mistakes in the past, not whisking the eggs enough. 
Ready to go in the oven
Spoon the mixture onto lined baking trays and bake in the oven, 140oC, for 2 hours. They should be crunchy on the outside and sound hollow when the bottom is tapped. 
Cooked meringue
The verdict: These meringues were very plain, however, they were very tasty. I don't usually like meringue, so I wouldn't eat many, but they just melted in the mouth with a very slight chewy centre. They would have been very nice with some fruit or cream. The book mentions how to make other flavours, this is something I'd be willing to try in the future. 

Tuesday, 16 July 2013

Blueberry and Orange Muffins

Todays recipe from Annie Bell's Baking Bible is from the Muffins, Cupcakes and Fairy cakes chapter, Blueberry and Orange Muffins. I didn't adjust these at all this week, just used the recipe and it worked very well.

It was a very simple recipe, as all of the recipes from this book seem to be so far. First step was to mix together the orange zest, juice, oil and eggs.

Stir in the dry ingredients and mix until all the flour is incorporatated. 
Batter mix
Stir in 2/3 of the blueberries. Fill up the cases and then scatter the remaining blueberries on top. Place in the oven to cook. 

In the oven
Once cooked leave them on a rack to cool. 

Cooling
And then enjoy!

Finished product
The verdict: I enjoyed these muffins, the texture was really nice and the blueberries had broken down well in the oven to give a lovely moist texture. I probably didn't enjoy them enough to make them again but they were ok. I would give them 7/10 and Gary also gave them that score.

Tuesday, 9 July 2013

Classic Financiers

This week I decided to make 2 recipes from Annie Bell's Baking Bible, the first was flapjack and the second is these classic financiers. These come from "the french quarter" chapter. Since I'd never even heard of these before, let alone made them, I decided to just stick with the recipe this time and see what happened. From the picture these looked like little sponge cakes. 

The first step was to mix together the icing sugar and ground almonds. To these I added egg whites and whisked. I then put in the honey, melted butter and vanilla and whisked until it was all combined. This was covered and then placed in the fridge for several hours. 

Once ready fill some cupcake cases, place some chocolate chips on top and cook in the oven for around 20 minutes. 
Ready to go in the oven.
Once they are starting to brown then take them out and leave them to cool on a rack. Once cooled remove from the cases and eat! 
Cake you guess which were which batch? 
At the baking stage I got a little distracted and forgot about my first batch :-\.. so they're a little darker than they should be. But fortunately my second batch were watched more carefully so I do have some decent ones too! 
How they should look, again please comment on my photography skills! 
The verdict: I'm going to base this on the decent ones rather than the.. erm.. crunchy ones!! Which actually didn't taste too bad to be fair. Anyway, I thought they tasted quite nice but they were nothing special. Even though there was an interesting mix of ingredients I didn't think they were really worth the extra effort. They were also tiny and despite the recipe saying I should get 24 I only got 18, so mine were bigger than they should be!! I give these 6/10, not something I would consider making again I don't think. 

Next section in the book is Muffins, Cupcakes and Fairy Cakes...mmm.. I've just seen the title of what I'll be making next week but not telling!! 

Monday, 8 July 2013

Flapjacks

One of the changes I'm going to try and make to my blog is to publish the recipes I use. In order to do this and not to be copying others I will have adjust them slightly to make them my own. This will probably involve a fair bit of trial and error but I'll always be sure to give an honest verdict at the end of the page. I will still be doing some original recipes but as before will acknowledge and give brief details rather than the full recipe.

So today's recipe is adapted from Annie Bell's Baking Bible, but I've made some changes to it to make it my own. I decided that flapjack alone is quite plain so I added sultanas and chocolate. 

Ingredients:
240g Butter
180g Demerara Sugar
225g Golden Syrup
350g Rolled Oats
Handful of Sultanas
100g Milk Chocolate

Method: 
Melt the butter, sugar and golden syrup together until the butter is fully melted and the mixture is fully combined. 
Butter melting in a pan with sugar and syrup. 
Add the oats and sultanas and mix until fully combined. Place in a 23cm brownie tin and smooth with a metal spoon. 

This is cooked in the oven for 20 minutes until it's starting to lightly brown. Cool on a rack. 
Cooling flapjack
Meanwhile melt the chocolate either in the microwave or gently in a bowl over boiling water. Pour this over the cooled flapjack. 

Cut into approximately 20 squares and serve. 
Ready flapjack. 
I've been thinking about my photography skills so I hope that the above picture makes them look appetising. 

The verdict: These are really really nice. Especially the edge pieces which are slightly more crunchy. The chocolate I used wasn't very good quality so next time I'd use proper chocolate, however, the flapjack mix its self was delicious. I did use proper butter, shocking I know, so that probably helped. I can't think of any way to improve these, other than the chocolate. I really enjoyed the addition of sultanas and chocolate and thought it added something to the recipe. I'd like to make these again some time when I'm not thinking about my diet and can eat the whole tray. 8/10 from me this week. 

Thursday, 4 July 2013

Lunettes

Mum gave me a new book this week, Annie Bell's Baking Bible, and I've been fast running out of ideas to create. So I've decided that this is another book that I'm going to work my way through. In order to mix it up I'm going to make things from the different sections each week, preferably working down the lists unless there's something I really don't want to do or have done before. 

Chapter one in her book is Cookies and biscuits and the first recipe is Lunettes. Apparently these are a French tradition and are similar to jammie dodgers. 

These are so easy to make. The first step is to cream the butter (and I used real butter this time!!) and icing sugar. Add the egg yolk and finally the flour. This forms a dough which is then placed in the fridge overnight to chill. 
Dough wrapped in cling film and ready for the fridge

Next day the mixture is rolled out and cut using a fluted cutter, 8cm, and then a hole is cut in the middle, 2cm in half of the biscuits. These are placed on greaseproof paper and baked in the oven for 12 minutes. Until they're just beginning to colour. 

Biscuits cooking in the oven
These are then left to cool.
Cooling on the rack
When ready add some jam, spread it around on the biscuits without holes but not too close to the edges and place the holed side on top. Sprinkle with icing sugar and serve. 

I'm currently doing a post baby diet in order to lose some weight. In order to motivate us I'm competing with my husband to see who can lose the most and if I win I get £5, hooray!! I intend on saving this and buying the numerous items I want for my baking and kitchen! So this means that I need to know how much of my recipes I should or shouldn't be eating. Today's biscuits are a staggering 258 calories per biscuit!! 


The verdict: These are melt in the mouth, just like shortbread. really tasty. The recipe was really easy to follow with plenty of detail and the end product is great. It's a shame they contain so many calories as I could easily eat them all. The jam is nice as it adds another dimension, I like shortbread anyway so the combination is great. Definitely worth a try. 

Next section in the book is traybakes and bars but I won't tell you what the first recipe is...