Showing posts with label birthday cake. Show all posts

Thursday, 25 June 2015

90th Birthday Cake

I was asked to make a birthday cake for a 90th birthday lady. My brief was nothing too fancy so I kept it simple with this design. 

To give the cake a little design I crimped around the edge of the cake and board. 

The sugar flowers are carnations, sweet peas, and roses. This is just a simple little bunch to give the cake something a little special. Sugar flowers always lift a cake. 
Sugar Flowers
To finish off the cake I piped a message and used ribbon to create a bow on the front. 
I hope the family liked the cake and enjoyed it. 
Finished Cake

Monday, 8 June 2015

Frozen Dome Cake

I was asked to make a frozen cake for a little girl's birthday. I was sent a picture they had seen and used this as my inspiration. 

I have seen online that there is a trend for having glass bowl on the top of the cake, especially on frozen cakes. I purchased the characters online and sold these on at price therefore not making a profit and not breaching copyright. 
Characters in a bowl
The cake was a vanilla sponge filled with vanilla butter icing and raspberry jam. I covered the cake in blue sugar paste and then topped this with a smaller piece of white sugar paste. 

She wanted a little bit of sparkle on the cake so I sprayed it with lustre to give it a slight shimmer to it. I also sprayed the piece that I put on top of the bowl. 

The snowflakes were made using the Claire Bowman Crystal lace mat and lustre white cake lace. These are so effective and look great. They can easily be stuck on with water. 
Cake Lace
I stacked the cake together and the final step was to pipe the message onto the board. 

I've been told the birthday girl was really happy when she saw that cake, which is lovely. I hope she had a fantastic party and it's always nice to receive positive feedback. What do you think of this one? 
Finished Cake


Thursday, 16 April 2015

Patchwork Quilt Cake

For my younger sister's birthday I made a patchwork quilt cake. She doesn't like sponge cake so I made her a rich fruit cake which I covered in marzipan and sugar paste. 
My first job was to create the quilt. I used little circles and rolled these into the paste so it was a smooth finish, you have to be careful to roll in both directions in order to maintain the circular shape. I then used a quilting tool to create stitch lines along the cake. 
Top view of the cake
Added to this some buttons which I made using a mould. To finish up I put some yellow ribbon around the cake. 
Side of the Cake
I hope she liked the cake and enjoyed eating it. I hope it was a simple but effective idea. 

If you need a cake for any occasion please don't hesitate to get in touch.

Tuesday, 7 April 2015

Flower Topper

I was asked to make a flower topper for someone to use on a cake they were making themselves. She wanted it really colourful and asked for mainly roses with a few filler flowers. 

Cream Rose
To fit this brief I made roses in blue, pink, purple and cream. I also made some white jasmine and some rose leaves. I felt that any more flower varieties would overwhelm the bunch and make it look too fussy. 
I arranged these in a line bunch in order to decorate the middle of the cake and create a nice centre piece. 

Finished Flowers
Along with these flowers I also made a few extra so they could use some on the edge of the cake and balance out the cake. 
Smaller bunch for the edge
What do you think? 
Finished Bunch
Top View
Don't forget that I can make just the topper if you'd like to make the cake yourself or have a cake that you want to add something else to. I make the flowers to your specification and size. 
Pink Rose


Monday, 2 February 2015

16 number cake with red Roses

I was asked to make a 16 number cake decorated with red Roses and red edges. 

First job was to make the numbers, I didn't use templates or special tins for these I just made them out of standard circles and square. For the number 1 I used a 6" square, cut it into 3 placing one along the bottom, one for the stem and then the last is cut off to form the tip. For the 6 I used 2 6" round tins. The first formed the circle on the 6 and then last was cut in half to form the stalk. 

I covered these cakes in 2 parts. The edges they wanted red so I coloured a strip of icing and stuck this around the sides. I then cut a white piece to put on the top of the cake. 

I made lots of Roses from buds to full flowers along with leaves. These were then bunched together and placed in flower picks for the cake. 
Sugar Roses with leaves
I made some butterflies and allowed these to dry in shape before placing them on the cake. 
Top of cake
Finally I made some blossoms for the edges of the cake to add a little texture and I piped the message on the top of the cake.  

Front view
Overall this isn't my favourite cake. I had issues making the cake as numbers are tough to cover. I don't particularly like the colours but it isn't my cake. I hope the birthday girl enjoyed the cake, I know the cake inside was good.

Number 1 Blue Cake

I was asked to make a number 1 cake covered in powder blue icing for a little boy's first birthday. This cake was riddled with difficulties, the first was the cake itself. The young birthday boy was unable to eat eggs or milk so I had to find a recipe that was suitable for him to eat. I found one online that used oil and golden syrup to make it suitable. The cake seemed to be runnier than normal mixture but it came out looking like it was a nice texture. 

I cut the cake into 3 (it was a square cake) and shaped it into a 1 shape. I then covered it in butter icing and coated it in blue sugar paste. This was challenge 2 on the cake. the shape has lots of sharp edges and the icing is so easily torn as you try and shape it. 

I covered the shape in white stars to give it some contrast and also made some icing blocks with the birthday boy's name on them. Finally I made a little teddy to go on the cake. 

Ready for piping
My final task was putting it on a board and piping the message. I was a little stupid and put the cake on the left and piped on the right. Being left handed this made my life much more difficult with the piping, in future I'll remember this and put the cake on the other side!! 

I was pleased with how this little cake came out and I hope it was perfect for the birthday boy making his first very special. 

Finished cake

Final Christmas Cake of 2014

The final Christmas cake I created this year was for my own family gathering. I made a rich fruit cake, covered it in marzipan and coated it in royal icing. I used several coats spread over several weeks to produce a reasonable covering.

I made up some stringwork icing and piped these along the top edge of the cake. I turned the cake upside down and piped the top edge of the cake in the same way. I piped shell detailing around the bottom edge of the cake.

Finally I made some sugar roses, freesia and leaves and bunch these together for the centre of the cake.
Sugar Roses and Freesias
I was very pleased with how this cake came out. I think it looks beautiful but it's not particularly Christmassy. I'm sure my family won't mind though. This cake would make a beautiful anniversary or celebration cake. The piping is very fragile though so I would like to do too large cake in this design but I do like the stringwork and think it's very effective. 

Finished cake

Thursday, 1 January 2015

Anniversary Cupcakes

I was asked to create some cupcakes for a 60th wedding anniversary. I was asked to make red and white roses and to use edible lace in the design. I drew up a few designs and after some discussions we agreed in 4 main designs and 3 different flavours. 

So I created 20 cupcakes which were flavoured lemon, chocolate and vanilla. 

Using edible lace mats I made up various designs and used these to decorate the cupcakes. I piped along the edges of some to add more definition. I had made the roses out of flower paste, this was more of a challenge than usual as they were so small but after a few practices I got it sorted. I made red and white roses. 

Those cakes with roses I piped in the opposite colour in a "birdcage" effect. 2 of the cupcakes I decorated with edible diamonds to represent the diamond anniversary. 
Vintage Cupcakes
I was pleased with how these cupcakes came out and I hope my customer enjoyed them. I believe they fit the brief. I'm pleased to have this order so I can show that I can make cupcakes too. 

If you're looking for cakes, for any occasion including weddings to birthdays, please get in touch to discuss your requirements. 
Edible Lace and Roses

Friday, 14 March 2014

3 Tiered Flower Cake

For my sister's 30th birthday I decided to make a 3 tiered cake with flowers on it. She asked me to make lemon, chocolate and ginger cake. So I did. 

8" Lemon Cake
400g Butter
400g Self Raising Flour
400g Caster Sugar
8 Eggs
2tbsp Lemon Juice

6" Chocolate Cake
160g Butter
160g Plain Chocolate
25ml Coffee
1tsp Vanilla Essence
160g Plain Flour
1tsp baking powder
1tsp bicarbonate
240g Light soft brown sugar
3 eggs
150ml Soured Cream

4" Ginger Cake
50g Butter
50g Caster Sugar
50g Self Raising Flour
1tsp Baking Powder
1tsp Ginger
1 Egg
1tsp Golden Syrup

Once all of the cakes were baked I left them to cool and then cut them, using cocktail sticks as guides, at an angle. If I did this again I would cut the cakes at a much more of an angle. I then covered each of the cakes in butter icing and then sugar paste. 

I didn't have dowels, next time I'd use them, so I placed the cakes on boards and then put them on top of each other. The cakes sunk slightly but managed to hold pretty well considering there was no support. 

I cut out flowers and placed them on the side of the cake. I also rolled out a 30 for the top of the cake. Finally I made a Gerbera flower for the side of the cake.  
Gerbera Flower
Slightly Wonky Cake
Balanced Layers
Overall, considering the time restraints and lack of certain items, I was quite pleased with how this cake turned out. If I was to make it again I'd change certain elements and give myself more time to focus on it. I hope that my sister liked the cake and enjoyed the left overs. 

Tuesday, 13 August 2013

Pink and Flowery Birthday Cake

This cake was a bit of a last minute decision. We had 2 family birthdays within 2 days of each other and I was originally going to make the cakes the same week, however, a last minute trip to London meant I could do this one a bit earlier. It isn't the most inspiring design but it gave me the chance to practice a few bits and pieces. 

I decided to make a chocolate cake so I used a standard recipe:
200g Self Raising Flour
200g Butter
200g Sugar
4 Eggs

I also added a little baking powder because I didn't use real butter and I now know this makes quite a difference. Once the cake was cooked and cooled I made some butter icing:

250g Butter
500g Icing Sugar

and flavoured it slightly with orange essence. The whole cake was then filled and covered in the icing and placed in the fridge whilst I prepared the rest. 

I decided to decorate the cake with a base colour of pink, so using gel colours, I kneaded this into some ready made icing until the colour was even. I then rolled this out between 2 sheets of clingfilm and lay it on top smoothing with my hands to get an even finish. 
Pink cake
I wanted to pipe some wording onto the top of the cake. I've never really done complex piping before and was unsure what icing to use but I decided to give it a shot with just icing sugar and water coloured slightly purple. I wanted the icing to not be too runny that it would spread everywhere but also be thin enough to pipe evenly. 

Using a letter mould I carefully indented the icing with the letters so I had a stencil to pipe onto.
Lettered indentations
I then piped the icing on top. A few letters came out a bit spread out so I scraped them off and tried again. I was reasonably happy with my efforts but I will definitely have to research and practice this further. 
Piped lettering
I then wanted to decorate the cake with flowers creating an almost lace feel. I have loads of cutters so I rolled out some white icing and set about cutting flowers of all shapes and types. I started at one point and spread out using the little flowers to fill the gaps. It was all done by eye and what I thought looked good. I didn't want to overload the cake but I also wanted them to look like they belonged. I decided to decorate down the side of the cake as well so it looked like the cake was drapped rather than just stuck on the top.
Finished cake

Flowers cover the side as well as the top

Overall I was quite pleased with the cake. The flowers came out very nicely but the lettering could have been better. 

I am looking forward to attending a cake decorating course in September where I will be learning more techniques and improving my skills. I will keep you update with my progress and I'm sure they'll be many pictures of my practicing. 

Don't forget I'm available to make cakes to order. At the moment I'm just charging the cost of the ingredients. This cake would have cost £10. Please get in touch and we can see if I can make something to your taste and preferences. 

Friday, 18 January 2013

Shuttlecock Cake

As mentioned previously, it's my husband's birthday this weekend so I wanted to make him a birthday cake. He really enjoys badminton so I thought an appropriate theme would be to make a shuttlecock cake.

I had 3 options for the style of the cake:
1) Make a 3D cake in the shape of a shuttle and decorate the whole thing as such.

2) Make a square cake and place a shuttle image on top of the cake, this option gives room for name personalisation etc.

3) Make a square cake and carve out the shape of a 2D shuttle and decorate it as such.

Whilst I think option 1 would look very impressive, it is the mostly likely to go drastically wrong and in my current state a bit too ambitious, so it was between 2 and 3. I decided to go with 3, and make the shape of the shuttle, I think this will be more impressive and more what I'm trying to achieve with this cake.

First step was to make a template of the shape of cake I wanted, this was important so I could find out what size tin I wanted to make it in. I drew this freehand after borrowing a shuttlecock from my husband's supply. 
Paper template of the cake
After this we worked out that I would make a large rectangular cake so used a big roasting tin. For each layer of the cake I decided to use a 4 eggs mix, 200g of each of the other components:
200g SR flour
200g Sugar
200g Marg
4 eggs.
I then melted 100g of white chocolate and stirred this into the mix and also stirred in some halved raspberries, carefully so they wouldn't break up too much. 

This mix was then put into the tin and baked in the oven for around 40mins, 200oC. I had to cook each layer separately, due to tin restrictions, and left each to cool down. 


Using the template I cut out the shape in both layers. 
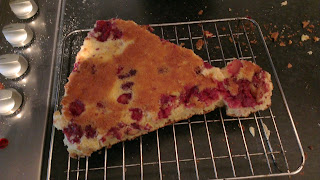
Top layer of the cake, cut and cooling. 
Bottom layer of cake, cut and cooling. 


Once the cake was cooled we made some butter icing to place the two cakes together and also I placed a layer around the outside of the cake. My husband really likes raspberry icing so I made this for him. 
250g Unsalted Butter
500g Icing sugar
Around 150g Raspberries mashed with a fork. 
Cake covered in raspberry butter icing.
We used ready made fondant icing to create the outer layer. I got my mum busy colouring and rolling for me. The first layer needed to contrast the white outer layer, I decided on a grass green colour. Mum mixed in the gel icing colour and rolled it out to cover the outside of the cake. 

Mum hard at work
Green icing is applied to the cake. 
The icing was naughty and stuck to my special mat, so this has resulted in a slightly rough surface and some tears. Next time we will only use cling film as this worked much better for the later layers. 

The next step was to cover the round end of the cake, we decided to colour this a golden yellow, again I got mum to work with this and we carefully placed it on the end. 


Yellow cap is on
Next step was the important step, creating the feathers and the grid pattern. I had two choices, either make them as separate pieces and stick them on or make it as one piece. I decided 1 piece would be better so mum got to work rolling that out. I wasn't sure whether to cut it and then place it on or place and cut, we decided it was less likely to fall apart if we placed it on and then cut it out. 

White icing ready to cut into pattern
Using a feather shuttle as my template I set to work cutting out the pattern freehand. I used a very fine point and marked it out first of all working out where everything would go. Once I'd outlined it I use a sharp knife and my point to carefully extract the spare icing. 

Me concentrating on the design
While I was cutting mum created a band to join the white and yellow icing, again colouring the icing and rolling it out. I then placed this on top and cut it into a strip. 

I used one of my icing tools to carefully mark feathers into the icing by tapping gently and repetitively  Once that was done the cake was finished. I was happy with the end product and, apart from the green icing layer, I don't think I could have done any better. The cake looked like a shuttlecock. We are yet to taste it so I can't comment on that but looks wise very happy. My husband also likes the end product and says he gives the design 9.5/10, which is a high score so I'm happy. Hard work but worth the effort. 
The finished product with my two real shuttles as inspiration. 
The finished product. 

Wednesday, 17 October 2012

Dad's VW Cake

Recently I have been quite unwell and unable to create cakes to the standard that I would like, however, with a lot of help, I made my dad his birthday cake last weekend. My dad has always been a great VW supporter and used to love his camper van and seeing loads come down to Brighton the weekend before inspired me to make him a camper van cake. It was a very simple idea, create a rectangle and decorate it. 

I order to make the cake, my husband and I, made a sponge mixture with a bit of mixed spice in it and baked it in a square dish. When cooled and at my parents, I cut this into 3 sections, piled 2 on top of each other and then the 3rd piece was cut to make the cake slightly longer. 

I made some lemon buttercream to hold the cake together, using butter, icing and lemon juice and then applied this over the whole cake to create a sticky surface for the icing. 

We rolled out the icing and covered the whole cake with white as our base layer. Then coloured another piece red which was to be stuck, using edible glue, around the bottom of the cake and shaped into a V on the front. I also coloured some icing black for the wheels and the VW badge (which I cut using a sharp knife) and some grey for the windows. Mum made a bumper out of some more black and we made some flowers for the roof using purple and my new cutters. 
Side View


Flower Power


VW badge on the front


Overall the van was recognisable but did look rather like a collapsed camper van rather than a fully functioning one. If I had more time and energy I would have made this more uniform and neat, however, I was happy with the end result as was my dad. 

Next up is my mum's birthday at the beginning of November, let's hope I start feeling better by then and am able to put more effort into hers. 

Tuesday, 2 October 2012

The Final Peppa Pig Cake

This weekend fast approached and I needed to make a cake for my niece's 2nd birthday, all the preparation and practice was coming down to this final product.

I had a few problems with my Peppa shape sinking slightly so I read about this and discovered that if I make her early and leave her to dry a little then this might solve the problem, therefore, I made Peppa and George on Wednesday before everything else and left them in an airtight container in the fridge.

To make Peppa and George, I started off by colouring the icing to a pale pink using my paste colours. I then made 2 balls, different sizes and carefully shaped these into Peppa and George's faces, having done this before it wasn't too difficult. I then coloured 2 further balls of icing blue and red for the bodies. I decided I wasn't going to try and make feet as I didn't know how to make them strong enough so we'll pretend that the feet are in the puddles. I also added some pink arms and a tail to the body and used edible glue to stick these on, great idea as it held so much more firmly.

Peppa and George ready for detailing.. 

Ruined Peppa
Finished Peppa
Then came the difficult part, the details on the face, I started with colouring a deeper pink circle for their cheeks and stuck these on with glue. Then I did made small white balls for the eyes and stuck these on. Using a toothpick I dotted a small black eye on both. And then came the painting, I diluted down some paste with water but the first time my mix was too runny and I ended up ruining my Peppa, therefore I quickly made another one and reduced the amount of painting I would do. I used one of my new tools to make nostrels for her and painted in those and just dotted some on for George. Finally I painted on a small mouth on both.
As you can see from the pictures I also made a 2 out of some icing which I coloured yellow, this was just an easy sausage folded onto itself and carefully proportioned in order to create an image.

Next step was to make the cakes, due to my current sickness issues I needed help at this stage from my wonderful husband. I instructed him to make a normal sponge by adding 600g of flora, sugar and flour together, mixing and then adding 6 eggs. Once the mixture was lovely and light he split it with 1/4 in one bowl and 3/4 in the other. We added cocoa to the 1/4 and pink colouring to the remaining 3/4.  These were then layered into 2 different cake tins, a larger and smaller one. Normally I would have liked to have cooked 4 layers here but we don't have the tins so we had to make 2 larger cakes to be sliced later. We used a toothpick to create a marbling effect and hoped it would be better than last time due to the ratio of dark to light. The cakes were cooked until pulling away from the sides of the tins and a knife was coming out clean, and then left to cool overnight.

Next day my husband cut the cakes into 2 for me down the centre and levelled them out ready for the final decorating stage. 
Cakes are halved
And level.


Together we made some raspberry buttercream and then formed the cake. Buttercream went between each layer and around the outside of the cake. We coloured a block of icing green  and this was to cover the whole cake. Unfortunately this fell apart and so the surface of the cake wasn't very smooth and became patchworky but we didn't have time or energy to try again so left it. I cut out some muddy puddles for the top of the cake from brown icing and stuck these on with edible glue. Using pink icing I cut out Keira's name and stuck on the outside along with some butterflies to try and cover the bumps. 
Cake is iced and named


Muddy puddles
Close up..


Finally once we reached the house, using cocktail sticks, Peppa and George were placed on the top. The cake was complete. 
The finished cake

Close up Peppa and George
Slightly different angle


The marbling on the inside came out much better this time so I've learnt that the lighter colour needs to be a much higher ratio than the darker. 

The cake is sliced and here's the inside

A bit of artistic photoing from my hubby!!


My verdict is that it was ok but I would have preferred to get the icing better as I think this spoilt the finished product, I would also have liked to have letter cutters for the name